|
|
Post by geezerman on Oct 20, 2013 15:59:49 GMT -6
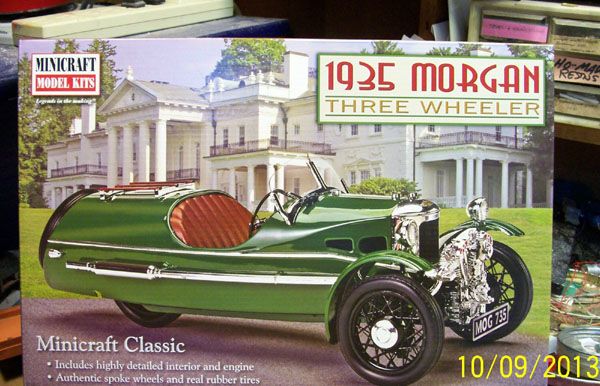
I picked this kit up (blowing my modeling budget for the rest of the year) because it's different, cool, and the car is the same vintage as myself. ;D My first report on the Minicraft 1935 Morgan.  Being my first venture into one of the larger scales (1:16), I really intend to do a nice job since it'll also be a rare, for me, out of the box build. My first thought, before I even got into it was to replace the plastic spokes with wire. Two things affected my decision not to. The kit's spokes are not all that heavy looking, I have seen 1:25 thicker than these. The other is that the spokes are cast all on one plane with not much hub to drill into that would let wires pass each other where they cross. There is a hairline flashmark on each spoke, so due to wanting to do as good a job as I can, I started to dress them off. Finding out that it's not a job for an impatient modeler. Figured two wheels and one new #11 xacto blade would be all I would want to handle for each session. 004 I have gained a noticeable difference in the spokes being thinner. Top row are trimmed while the lower row is stock.  Here's where my good intentions for a nice job are getting a real test. Laying off the spokes, I took the main engine parts off the chrome tree and ran them thru some oven cleaner. The plastic for the chrome tree stuff is a milky, kinda translucent white, and on the soft side. Reminding me of the horrid 40 Ford that Lindeberg stuck in the L700 truck kit. I wanted to clean up the fins on the cylinders where the two halves go together. I'm having a problem getting a clean cut with the soft plastic. Doing the best I can with new xacto blades, sandpaper and files. This sucks cause I really want the engine to look especially good. Good news is that the wheels and rest of the plastic in the kit is grey normal looking styrene. |
|
|
|
Post by harron68 on Oct 21, 2013 7:13:25 GMT -6
Morgan 3 wheeler was a way to have a "sort-of" car and avoid the British tax on cars then. It would up being a fun and sporty vehicle for those on a budget. No idea how they could stand being out in the cold drizzle and fog of Winters! Good luck!
|
|
|
|
Post by bob29579 on Oct 21, 2013 8:15:22 GMT -6
Nice. They really do thin out.
|
|
|
|
Post by geezerman on Oct 21, 2013 17:16:49 GMT -6
Not much progress from last post. I cleaned up one more wheel, and got the cylinders and crankcase cleaned, figured out, matched up, and painted.
I'll tell you, if someone tends to assemble this kit they better know this engine or find out about it. All engine parts are on that chrome tree and the plastic is crap! Parts do not match up well and are hard to clean up. Instructions are very minimal, so you have to know what's what and how it is positioned.
Blurb at front of instruction sheet says most engines are J.A.P. 980 CC V-twin. The Matchless MX2 was another popular option. Inside where they show approximately how it is assembled, there is a little notice that says the engine is a Matchless MX2. That helped me Google a couple of other good photos. Most all fotos found only showed the front of the engine, so I'll have to guesstimate where other stuff may go.
And, SAM, the frame appears to be tubular.
|
|
|
|
Post by geezerman on Oct 22, 2013 9:42:49 GMT -6
I suppose I've whined enough about the chrome tree plastic, so I'll try to curb that down.  I brushed across one of the heads and one of the spark plug tops rubbed off, so I'm replacing them both with straight pin material.. Here I have the basic engine parts together.   Have a couple of delicate parts to deal with yet. The rocker arm springs and the push rod covers. Hope I can clean those parts off and not have to replace anything. |
|
|
|
Post by bob29579 on Oct 22, 2013 14:17:31 GMT -6
 I found a line drawing of the back if that helps. |
|
|
|
Post by geezerman on Oct 22, 2013 16:48:50 GMT -6
Thanks, Bob. That's a different engine.  I got into the rockers and rod covers this afternoon. 'Twas nasty! Being unschooled in this, I tried following the instructions as a guide. Mistake ! The rockers were mislabeled in the instructions, which only showed the left side. Supposedly the right was to be a mirror assembly. Things didn't work out so well and I had to do some drastic adjusting. I went to do the other head, and when I went to the tree for those parts (which were on the other end of the tree), I found they were different and the part numbers on the tree weren't even mentioned in the instructions ( C-3 & C-4). I really had to work over those. You can see on the model That there are additions on the bottom of the rod covers. I had to build some new pieces for the right side rockers also. Should look better when I get them cleaned up. SIGH!   |
|
|
|
Post by harron68 on Oct 22, 2013 18:51:59 GMT -6
I guess I always used trial and error and the "exploded view" as with your instructions foto, rather than following the numbers either on pieces or the sprue tabs. I was thinking when you wrote that the engine plastic was soft, the detail of the fins would be hurt, but your work looks fine so far. We have faith in the prince of polystyrene plastic parts painted with perfection.
|
|
|
|
Post by geezerman on Oct 23, 2013 10:33:17 GMT -6
I wouldn't want to discourage any one from this kit. I think I'm gonna end up with a pretty nice model ! I spent a considerable amount of time cleaning some reasonable flash from the chain links and sprocket teeth. To be a little verbose, I'll explain that my man cave is in a shed on the opposite side of the carport from the house. That safely insulates it from my sweet Christian wife who has spent 99.99% of our 15 years in Florida, excluding to and from the car, avoiding the outdoors. So, saying that, I figured if I broke this chain, any pretense at all of religion would be totally abandoned. My man cave lets me properly admonish evil inanimate objects. Fortunately all turned out well, the chain and tranny assembly are safe and in primer.  |
|
|
|
Post by bob29579 on Oct 24, 2013 15:21:54 GMT -6
And looking good, too.
|
|
|
|
Post by tomcd62 on Oct 25, 2013 0:48:22 GMT -6
that engine is just so cool, does the hood open to show it off when complete?
I can't imagine what your annual model budget could be. how many have you built this year?
|
|
|
|
Post by geezerman on Oct 25, 2013 5:22:24 GMT -6
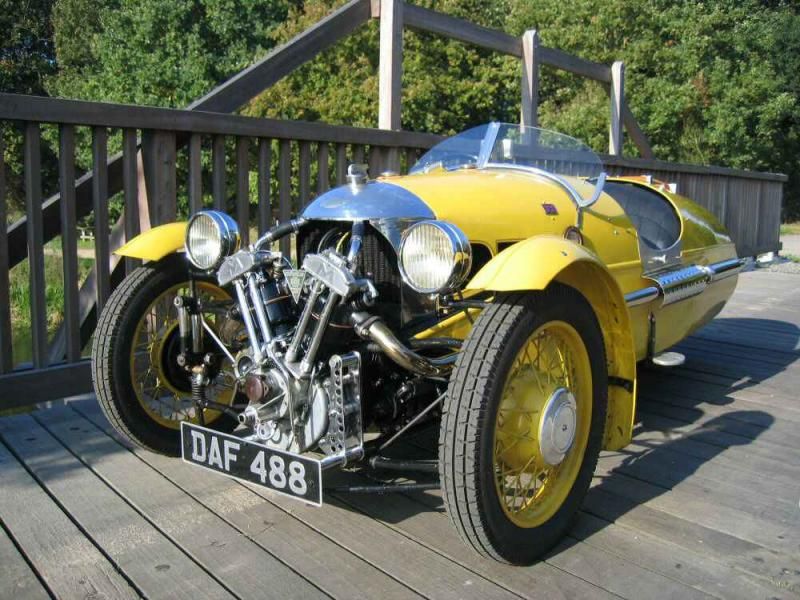
Tom, I probably have not bought more than 2 or 3 kits in any one year. I model mostly from salvaged stuff I have collected over the years. I am on SS, but I have a little cleaning job that gets me a few dollars 'mad money' once in a while.  The engine on these Morgans are exposed in the front. This foto is of a 1937 Custom Sport. This appears to be water cooled as opposed to the Matchless motorcycle engine that comes in the 1935 kit. I saved this foto because of the color. I think I'll do mine in yellow.  |
|
|
|
Post by bob29579 on Oct 25, 2013 8:19:32 GMT -6
That is one hell of a design, isn't it ? Using the engine as a bumper...
|
|
|
|
Post by geezerman on Oct 25, 2013 17:22:21 GMT -6
|
|
|
|
Post by harron68 on Oct 26, 2013 6:11:48 GMT -6
Cool foto of bare frame and suspension. Easy to see from this how light and low it was for acceleration and cornering. Didn't Peter Sellers drive one in one of the Pink Panther films? Maybe I confuse him with a different scene I saw once. Anyway, good luck.
|
|


