|
|
Post by bob29579 on Jul 2, 2010 15:51:41 GMT -6
Wow. Really coming along great, Danny. Thanks for the how to's, they'll really help me out soon... Greg.
|
|
|
|
Post by dannyi on Jul 2, 2010 18:32:21 GMT -6
..no problem Greg..............can't wait to see ya get started........
|
|
|
|
Post by geezerman on Jul 3, 2010 5:23:36 GMT -6
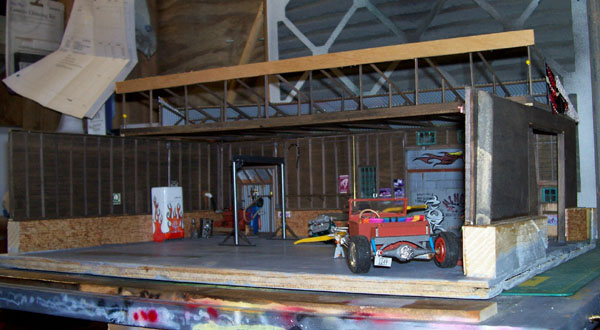
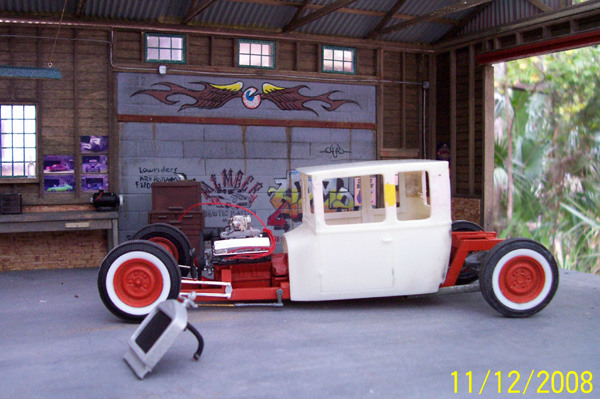
Danny, here's a point, in case you hadn't thought of it. Leave the flooring in place on the rear portion of the ceiling. You'll get plenty of light for photographing with just the front removed. This is so that you can take eye level shots and not have your workshop in the background over the top of the wall.  In this foto, I carried the dio outside to get some natural background in the opened side door and the windows  |
|
|
|
Post by dannyi on Jul 3, 2010 7:32:15 GMT -6
..that's an excellent idea geezerman! Hadn't thought about that......that's an awesome eye level shot you got there!........thanks!
|
|
|
|
Post by itsonlyakit on Jul 4, 2010 1:59:12 GMT -6
Danny, I have been following your progress with this dio. You have talent. I would like to suggest some texture mediums for your plaster/concrete floor.'Liquitex' brand Natural sand texture gel(6508) and Resin sand texture gel(6608). These acrylic mediums may be pre-colored with acrlylic paint. They can be applied like soft butter using palette knives and a just a skim is required. After they dry the suface may weathered further with acrylics, dirtied enamels, art oil paints, chaulks, pigments, etc.
Gel (6508) best for overall sufacing while the coarser (6608) to create interest, I suggest this because of the era of the "sweatshop" when power concrete finishing probably didn't happen. Thank you for sharing.
|
|
|
|
Post by dannyi on Jul 4, 2010 8:39:50 GMT -6
...you make a great point, I even thought about it, but couldn't find a whole lot of info. I have to admit I didn't dig real deep into it. Got a bit inpatient to get the floor started.
.......thanks for sharing the products with us, I want to try them next time I do a concrete floor. Interested to see how they work.......................
|
|
|
|
Post by dannyi on Jul 6, 2010 21:16:29 GMT -6
..I need to let everyone know that I committed a cardinal sin when it comes to plastering. I never sealed the board before laying down the plaster! Got a bit impatient and started the floor without doing it. Paid the price when the board warped. Was able to save my plaster work by putting weight on the board for 3 days. To keep it from doing it again, I put 3/8 trim board around the edging.   ..so remember "seal the base"!! |
|
|
|
Post by dannyi on Jul 6, 2010 21:18:36 GMT -6
....started out with the intention of dying the plaster with Rit Dye. It worked well in the past on HO project. But on a test piece I just couldn't get it to look right. Using a very diluted mixture of black. I was trying to lightly tint the plaster to a gray color while at the same time getting the dye to collect in the cracks and make them darker. When that didn't work I darkened the mixture. While that made the cracks darker it made the plaster way too dark. ....so I decided to experiment a little using Bragdon Powders. Using a small brush I filled the cracks with black powder. But when I went to wipe off the excess it stained the surrounding plaster. Remembering the effect water has on the powder I took a dampened rag and worked it into the floor. It turned out to be just what I was looking for. It has that time worn dirty look that would be typical of a service garage in use for 20+ years. After I figure out where everything is going, I'll add oil, grease and grime stains.    ..thanks for looking...till next time....... |
|
|
|
Post by dannyi on Jul 11, 2010 10:21:14 GMT -6
...I wanted to use a vintage 1920's-30's I beam hoist for this garage. Found these pictures while searching the web.....   |
|
|
|
Post by dannyi on Jul 11, 2010 10:23:33 GMT -6
Couldn't fine the right thickness H beam in my stash, so I desided to make my own. ..cut the pieces from sheet styrene....  ...then put that fancy 's' cut on the ends....  ..glued them together......  |
|
|
|
Post by dannyi on Jul 11, 2010 10:25:11 GMT -6
|
|
|
|
Post by dannyi on Jul 11, 2010 10:27:09 GMT -6
..here's a couple of shots with the Edsel........   ..now it's on to the cylinder and floor plate.......till next time.... |
|
|
|
Post by scaledetail on Jul 11, 2010 12:42:19 GMT -6
Dannyi,
I've been following this project, Excellent work, an technique.
As a Garage, and Dio freak myself, I can really appreciate your
efforts. I am Grateful to see that you are so willing to share
your little tutorial with everyone. I commend, and applaud you
for this. I love this thing so much, I had to have one of my own.
I spent the entire day yesterday drawing out my Ideas, plenty
more to be played by ear. With your permission, I'd like to start
a thread of my own, using your techniques. You seem to be a
great teacher, I hope to be a good student.
Thanks Dannyi!
Bill
|
|
|
|
Post by dannyi on Jul 11, 2010 14:18:32 GMT -6
Thanks for your kind words Bill, I appreciate that. But my friend, you don't need permission. By all means start you thread! I'm thrilled you're inspired to build one. I felt the same way after "philbass" posted his. Look forward to see what you come up with. If I can be of any help just give me a shout............
|
|
|
|
Post by scaledetail on Jul 11, 2010 14:24:45 GMT -6
Thank you!!!
and by the way, love the brake drums a got from you!
|
|